

ZWO has unleashed the full capabilities of the Seestar line of telescopes by incorporating Alpaca connectivity. This allows you to control your telescope using other software packages such as SharpCap and N.I.N.A. You're no longer limited by the 60 second limit on your sub-frames.
The first night out, I was able to shoot two minute sub-frames that worked quite well.
Another advantage is that the frames are saved to your computer rather than requiring you to download them for processing.
Setup is fairly easy but requires you to follow certain steps in order to make sure everything works.
NB: This information is accurate as of November 1, 2026 but may be subject to change with updates to either the Seestar or N.I.N.A.
Step 1: Setting up the Seestar
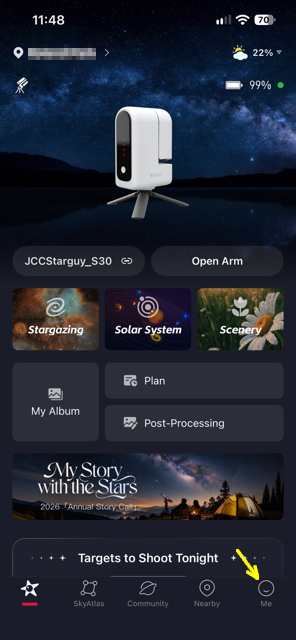
Start by turning on your Seestar and connecting to it via the Seestar app on your phone or tablet.
|
Use the "Me" icon in the menu to access WiFi and device management. |
|
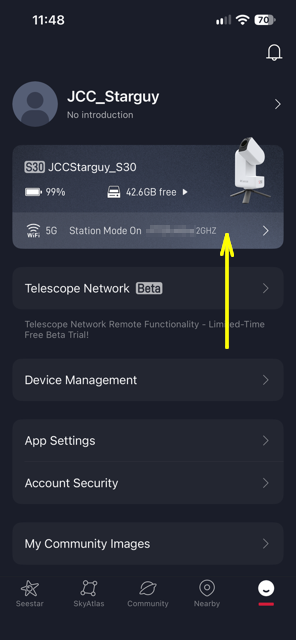
Click on this bar if you want to set up your Seestar in Station Mode (to connect to a WiFi network). If you're going to use the Seestar's built in WiFi, skip this and the next two steps. |
|
|
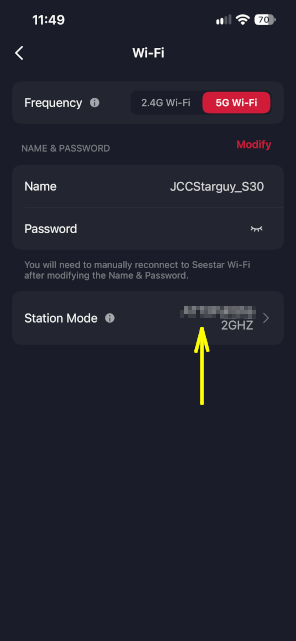
Tap this bar to access the Station Mode menu. |
|
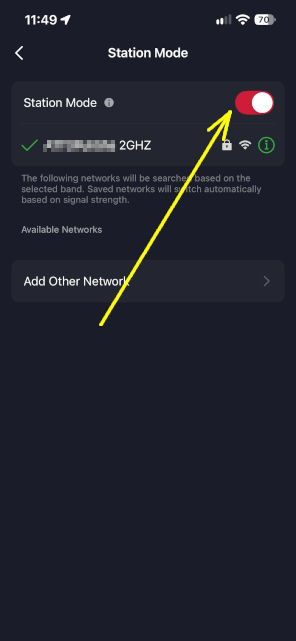
Turn on Station Mode. Log into your network using your WiFi password. |
|
|
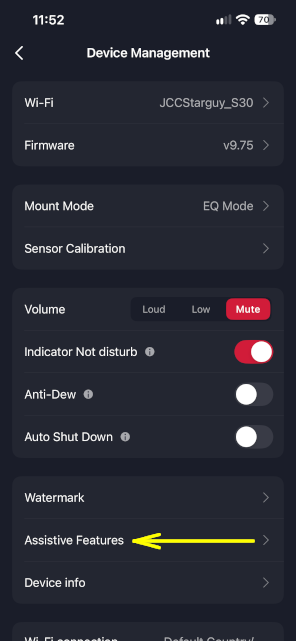
Return to your Device Management window and tap Assistive Features. |
|
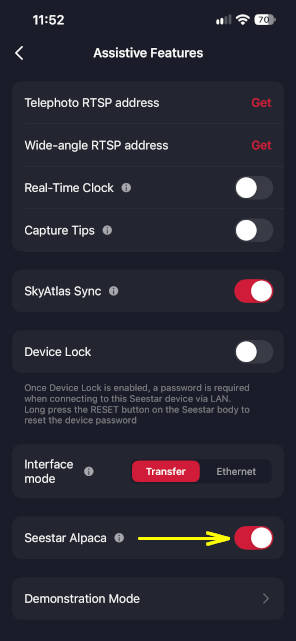
Turn on Seestar Alpaca. The Seestar is now configured to work with N.I.N.A. |
|
Step 2: Setting up N.I.N.A.
On your computer, make sure you're logged into the same network as your Seestar, either your regular WiFi network or the Seestar's built in WiFi.
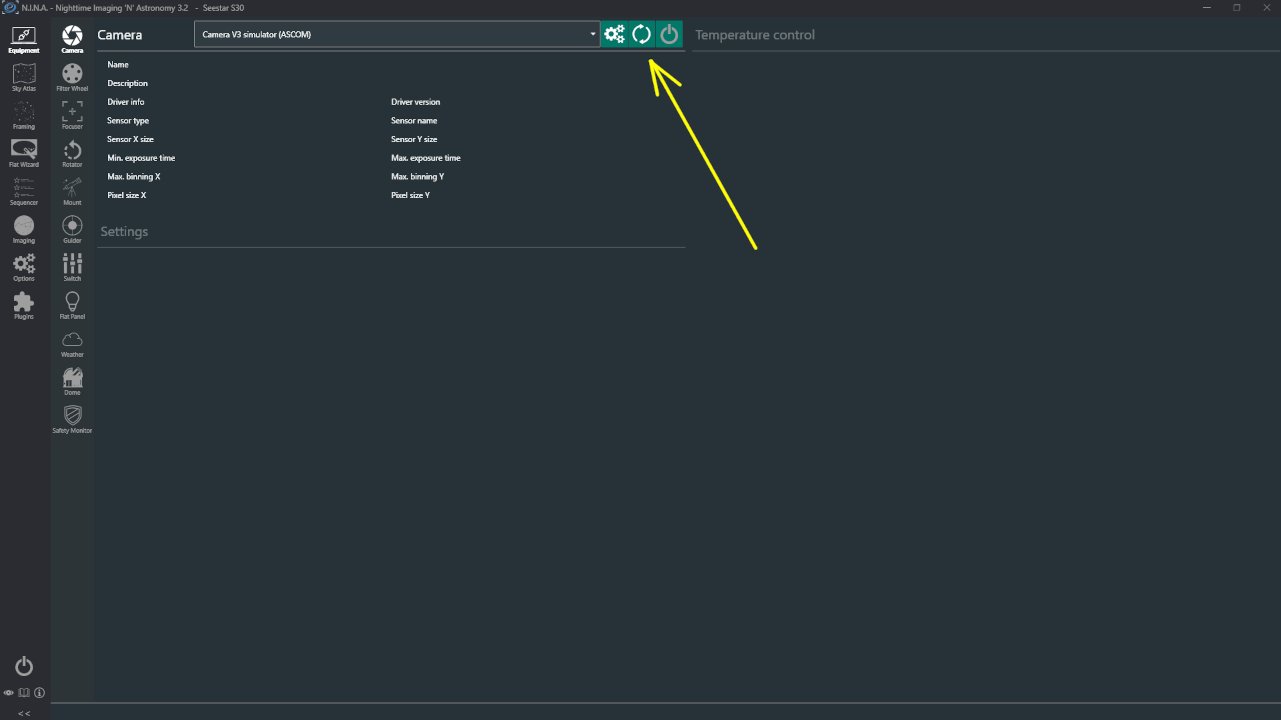
Start N.I.N.A. and go into the equipment menu.
|
Under Camera, click the Device Search icon to refresh the devices that N.I.N.A. can find. |
|
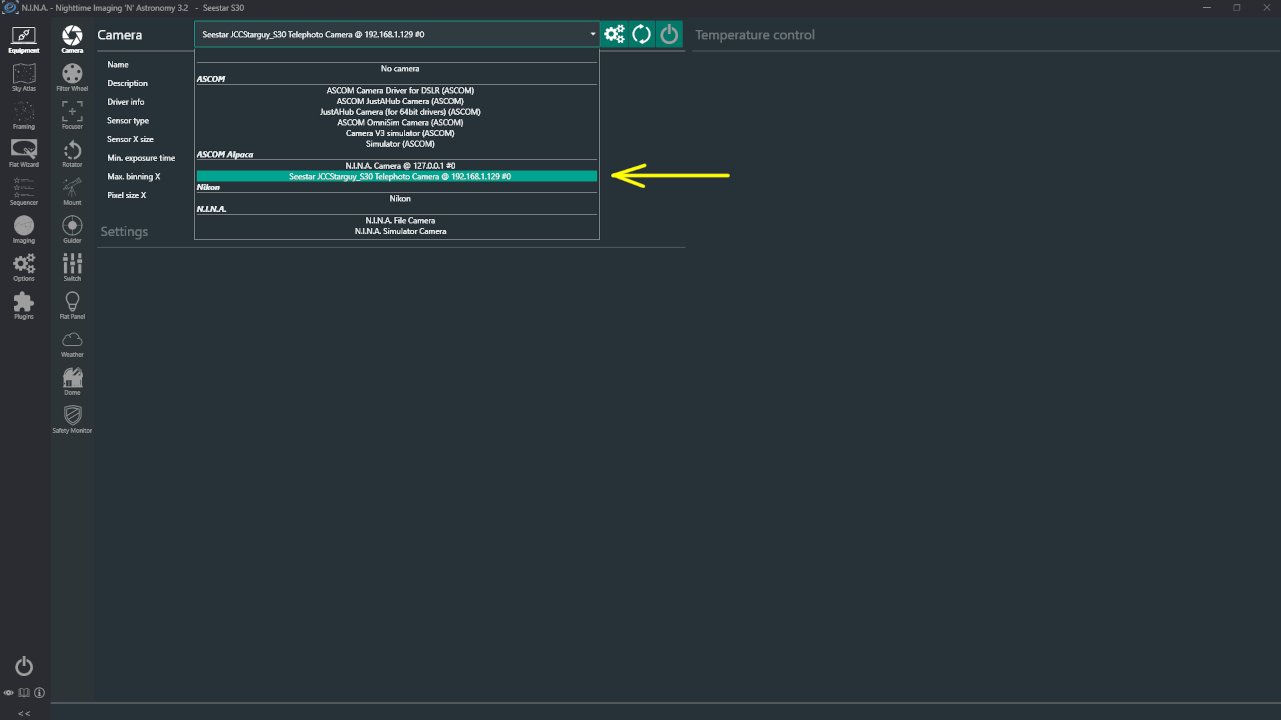
From the dropdown menu, select your Seestar. It will be listed by name and the IP address of the scope. Repeat this for the filter wheel, the focuser, the mount and the guider. |
|
|
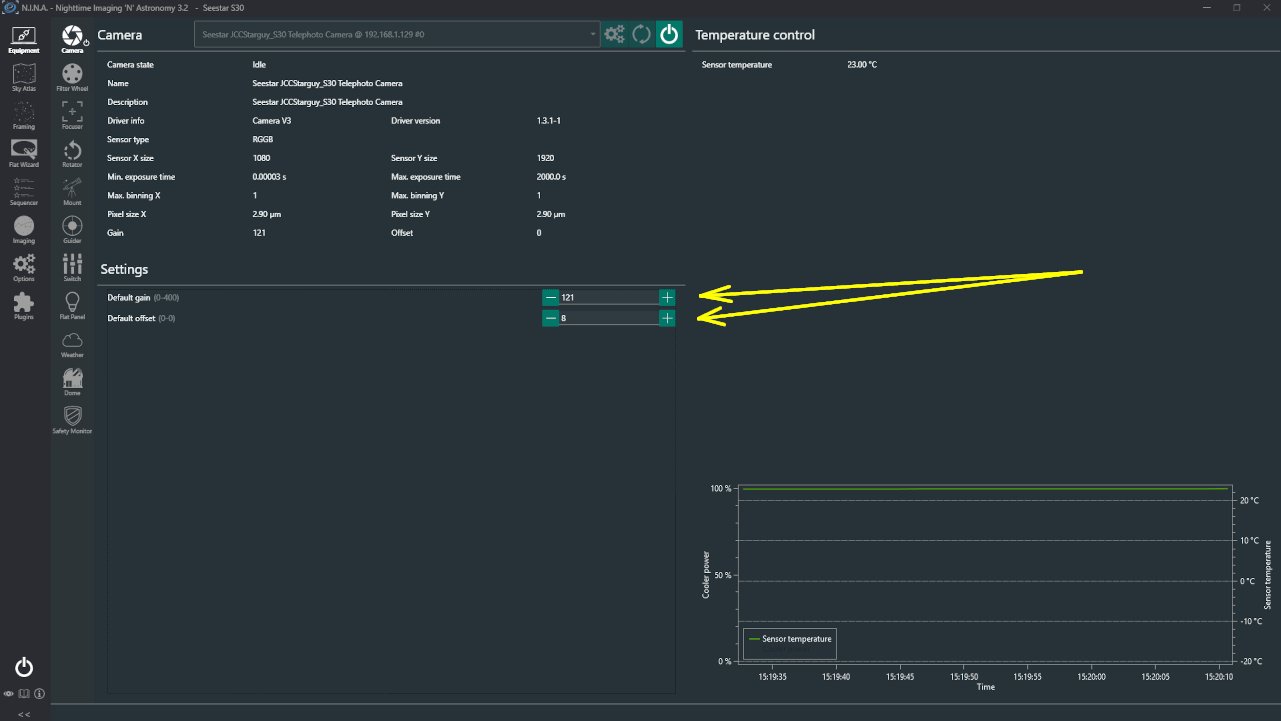
With the camera menu, it should look like this after you've successfully connectd. You'll be able to set the gain and offset from these sliders or type in the values. Because the Seestar doesn't have a cooled camera, you won't be able to set the temperature. |
|
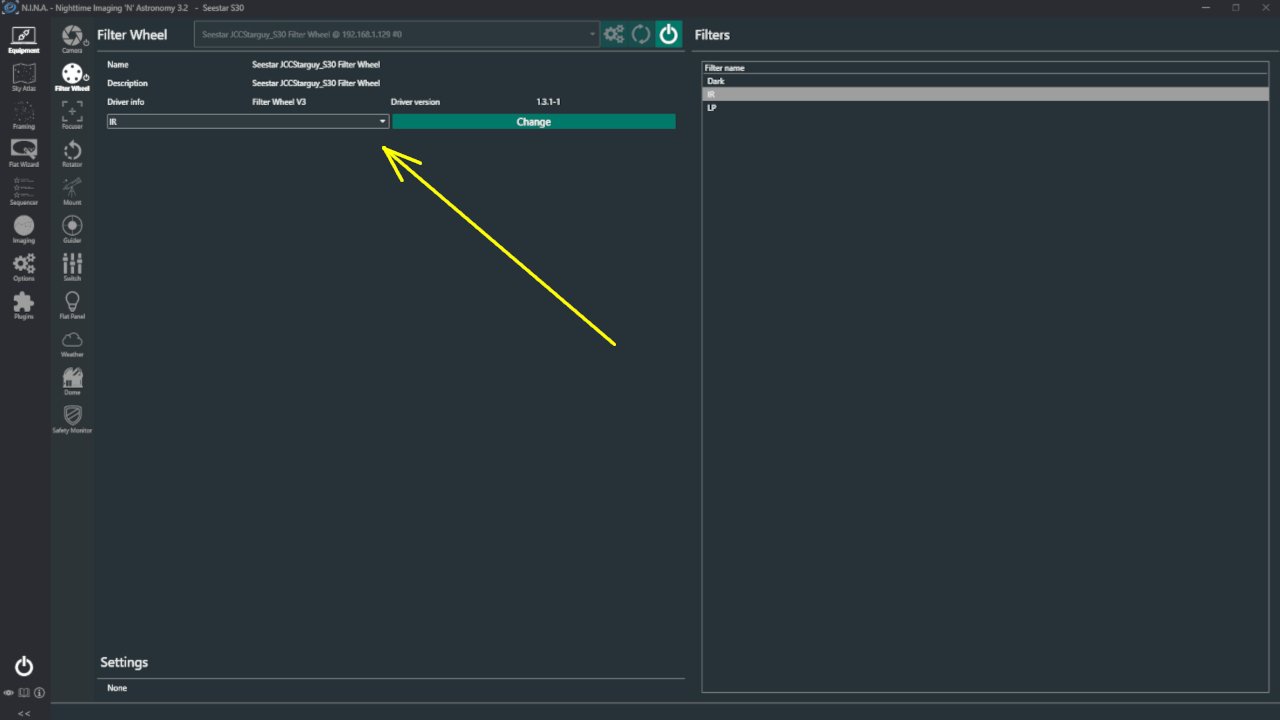
In the filter wheel menu, you'll be able to pick which filter you want to use from the IR filter (good for light pollution), the LP filter (a dual band filter) and the dark filter. The dark filter can be especially important if you want to shoot sub-frames that are longer than the 60 second limit imposed by the Seestar app. |
|
|
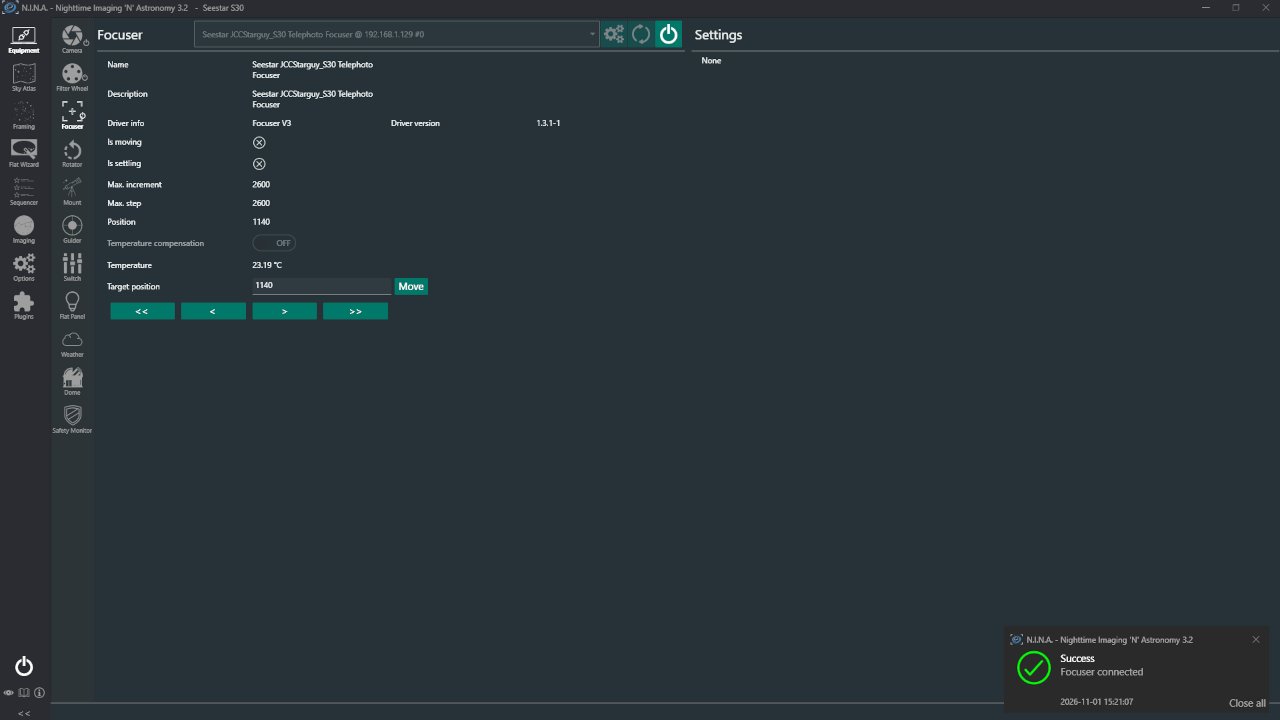
In the focuser menu, you'll be able to control the focuser in much the same way you can manually control it from the app. |
|
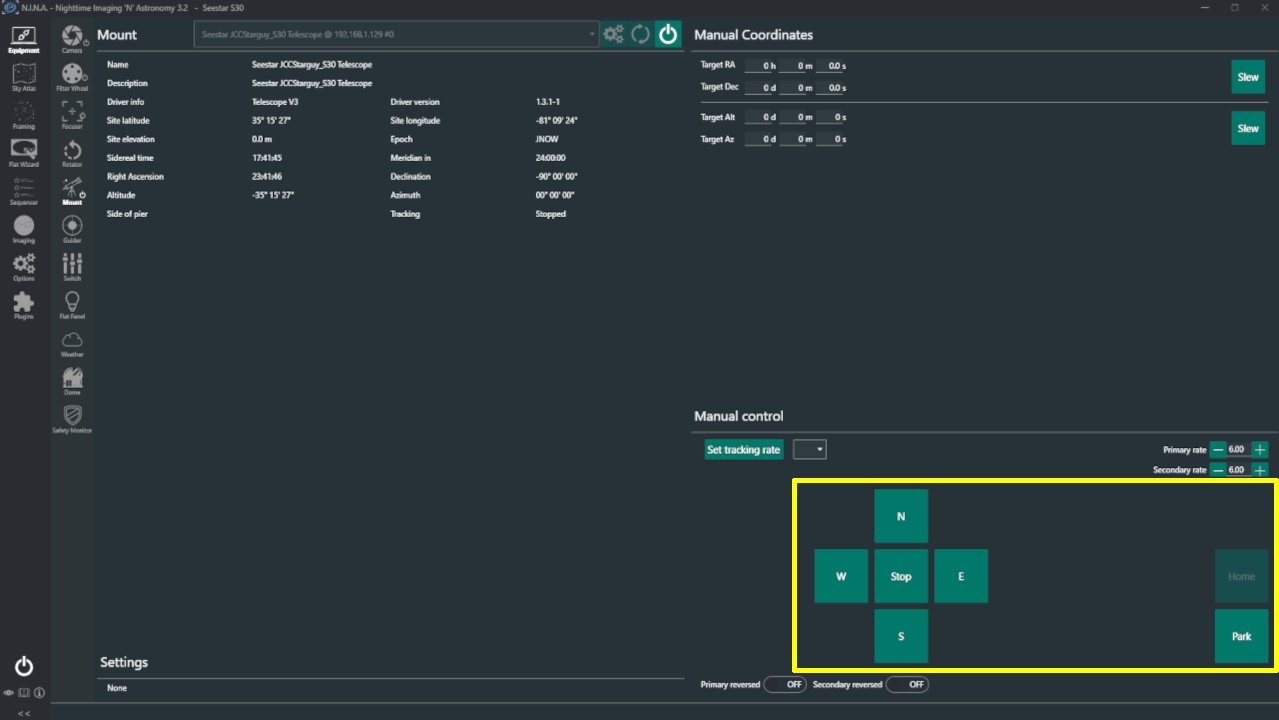
The mount menu shows that your mount is connected and where it's currently pointed. You can manually move the mount using the arrow keys at the bottom right of the menu. Clicking the Home button will close the scope's arm. |
|
|
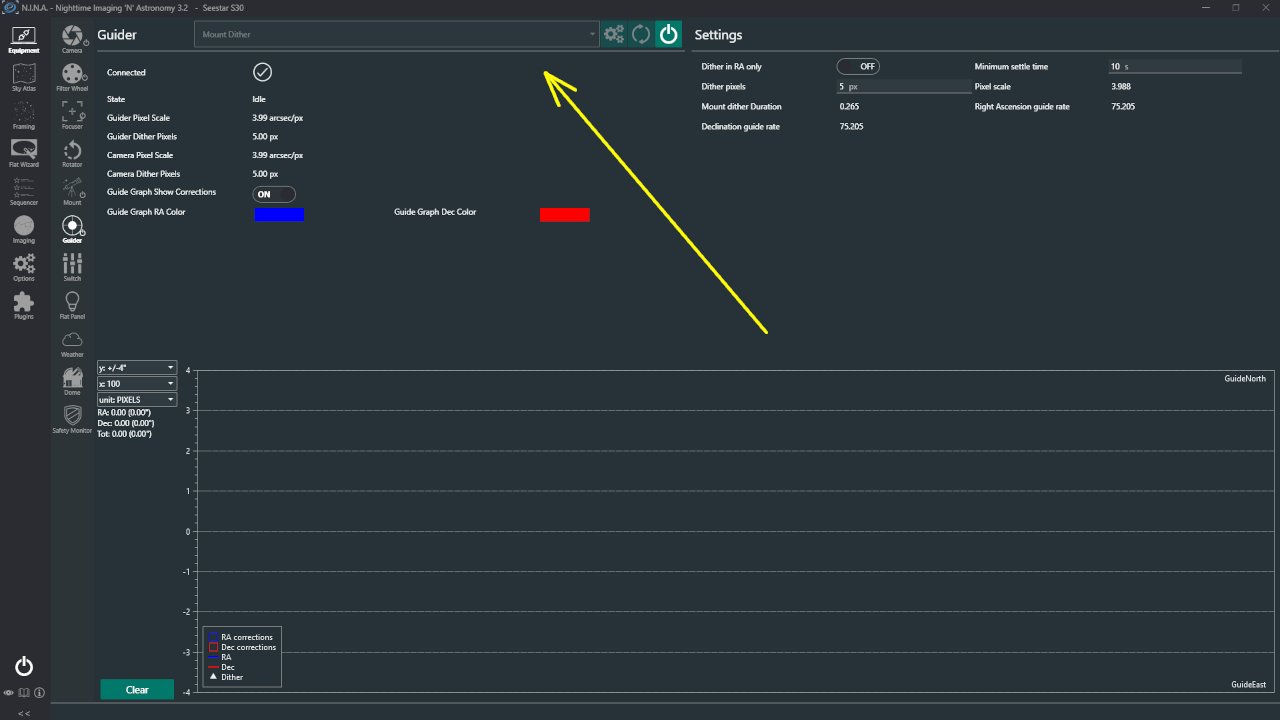
Because the Seestar doesn't have built in guider, select Mount Dither from the dropdown menu. When you tell the scope to dither in the sequencer, it will periodically move the mount slightly between sub-frames to avoid what's known as walking noise. Once you get the scope operational, you should use the Three Point Polar Alignment plugin in N.I.N.A. to get your polar alignment as close as possible to help compensate for the lack of a guide camera. |
You may now use your Seestar like any other telescope.
